Sunday, 1 September 2013

Assignment 5: Feedback

I have received feedback for my final Assignment for DPP1. The feedback was generally very good, my tutor recognized the amount of work and that i have presented a coherent body of work, which I am pleased about. The comments were technical in nature, specifically that a couple of my images still had some sloping lines. This is something I did spend a long time on, but obviously it just takes practice, and I need to look and re-look again and again to check them. I have edited the photos in question and will have them re-printed ahead of assessment. In addition, he suggested that some of the colours were a little too vibrant. This is probably a fair call, though I have decided not to go back and repeat the edit, as it was a long process and I am happy with the colours, particularly in the prints I have had made, but it is something I need to watch for in the future. I plan to purchase a printer later this year for use in my next course, so I shall have to fine-tune my colour management skills when that happens.


Why am I aiming for ‘consistent’ colours in my set? I guess I was looking for a set which held together and didn’t have large differences in colour/tonal range. It certainly dictated the days and times of day when I went to take the photos. I then processed them all in a similar manner, aiming for fairly bright strong colours in my final set, probably for aesthetic value. I manipulated the colours slightly in Lightroom using the selective colour sliders, mainly to bring out the blue skies, as I could have done with a polarising filter (perhaps I should have done this instead?)
 
In addition, he was surprised that I decided to present my images in the grid of 9. It's funny, this is the one aspect of the project that I decided on at the start and failed to question along the way. And fail is the right word here, because the one big thing I learnt with this assignment was that it is so important to continually question why I am doing things and what I am doing and is there a better way I can do it. But the grid of images is the only aspect  (probably not the only, but the main one I can see!) that I did not question during the course of my project, until my tutor pointed it out, at which point I agree totally that these houses are all different, and despite the project by typological in nature, it is not purely typography, and would be better presented in a my typical style, ideally blown up huge on a wall (30 by 40cm say). Each house is individual and should be presented as so. So that is how I would present this project if it ever got that far :) In my defense, I have never had an exhibition, so I have not encountered the issue of how to present my images before!

In summary, my tutor had some excellent advice which I include below when planning for projects:


Start off by writing your aims and objectives.  What do you want to be able to demonstrate by the end of the project? What do you want to have achieved? What processes do you want to learn or develop? What ideas or concepts do you intend to examine in your work?

Examine theories, articles and exhibitions that are relevant for your area of study.  Give yourself a reading list.

Tuesday, 30 July 2013

Assignment 5: Personal Project 'Hide'

The aim of this Assignment is straightforward, and seems like a fitting end to Level 1 for me: Apply all I've learned in the course to build a collection of 10-12 final images on a theme of my choice. Those following my blog will have seen that I have been working on this personal project for quite a while now (I think I started in November last year), taking images, taking more, then editing and re-editing as required, selecting my final choices and getting my images printed. I have documented this in my blog and all the entries are labelled with the 'Assignment 5' Label (accessed via this link).

I have learnt a lot during this particular Assignment, and I do feel like the hard study is starting to form some kind of coherent shape, and that it has culminated in what I feel is quite a successful project. The notes ask me to reflect on how well my project matches up to my original intentions, so I make some comments below:

How did I choose my theme? Was it a good choice?
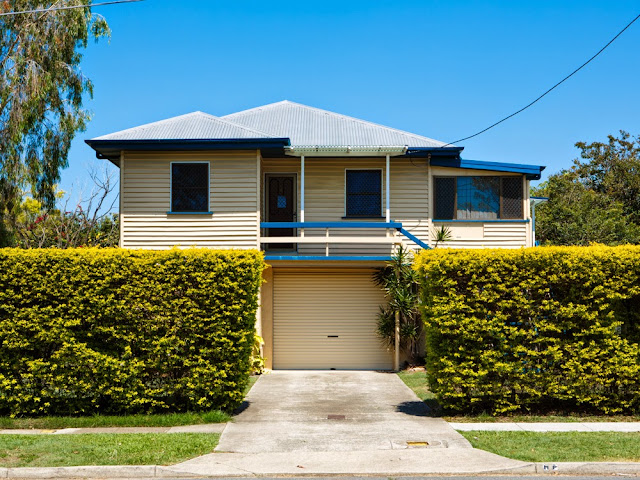
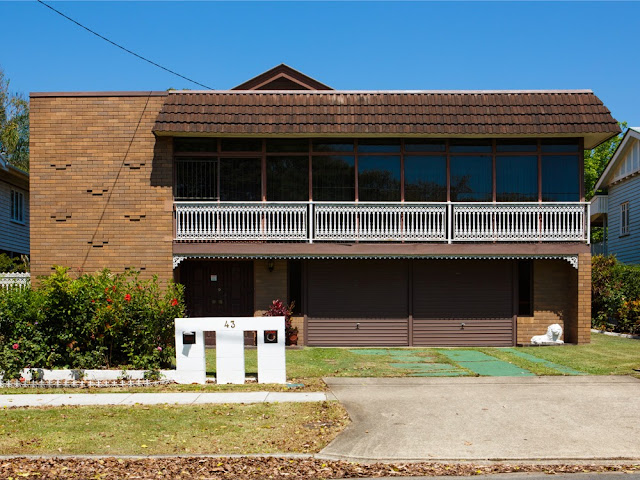
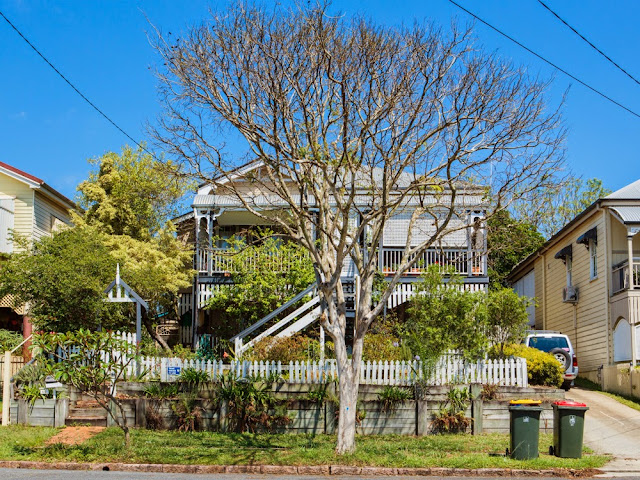
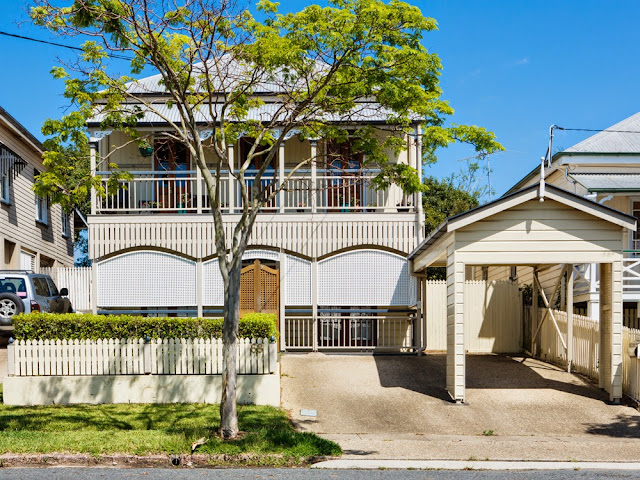
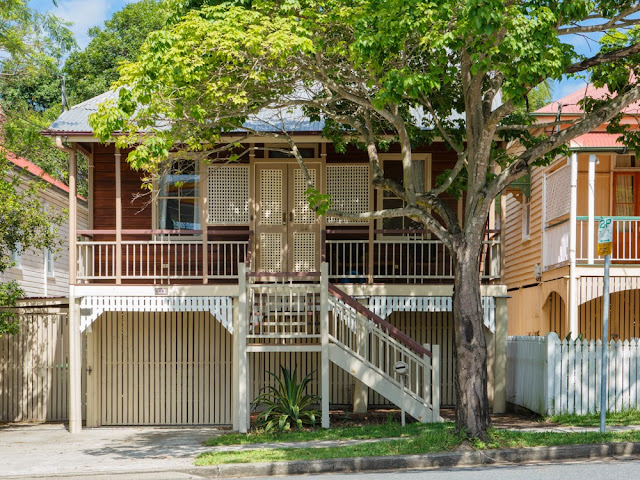
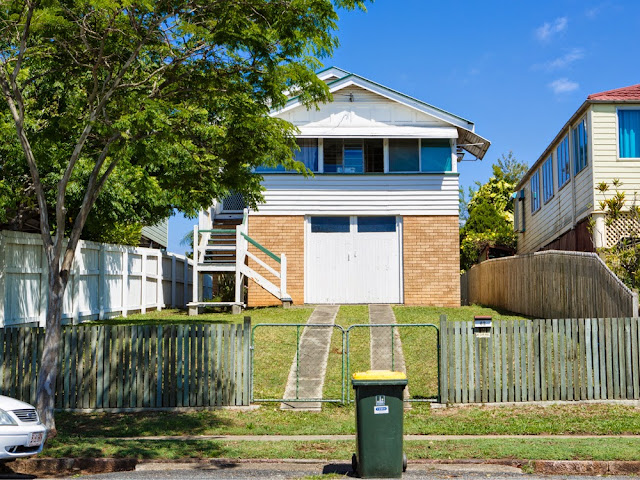
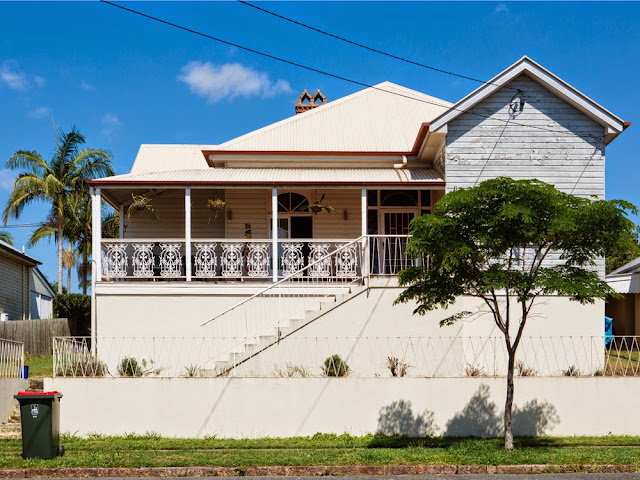
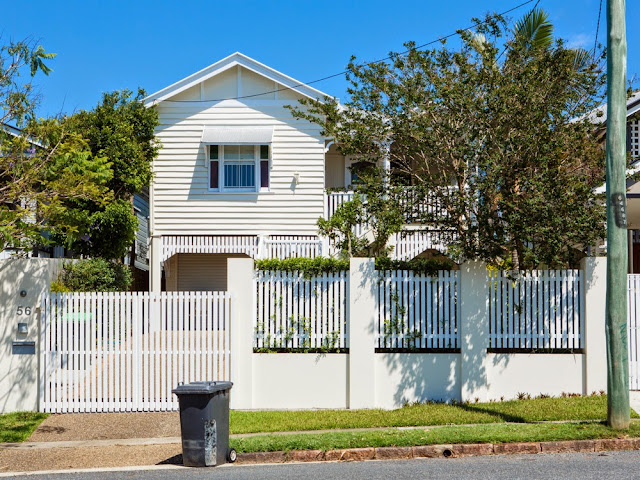
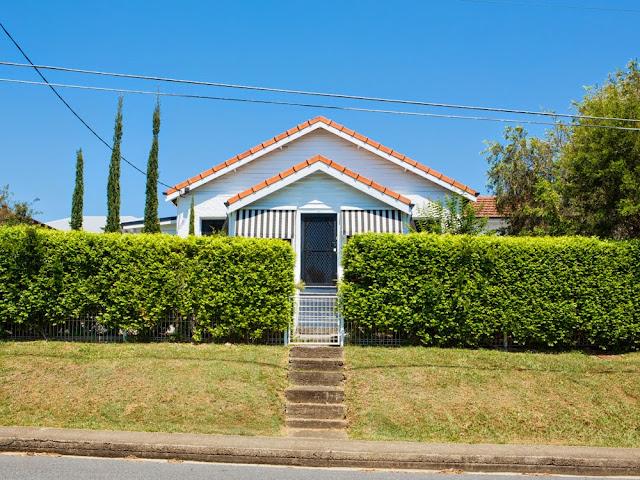
Well I was interested in Typology and also in facade/hiding/what we present to the world via our homes (during the time I was in the process of putting out home on the market, so was very aware of presentation and also hiding any personal touches within our home as much as possible). I have always liked pattern/repetition in photographic images, and had seen some of the work of the New Typology movement and thought it looked interesting. As I walked the streets with baby in pram, I found myself drawn to capture certain houses, so started doing so more methodically and carefully, bracketing my images, and exposing to the right, carefully framing, using consistent apertures/shutter speeds as much as possible and being aware of which way the sun was facing and thus which streets would produce better photos depending on the time of the day! I think it was a good choice because it suited me at the time (proximity is important!), was a personal interest (and I think will be interesting to others) and seems to hold together well at the end point.

What went well? What went badly?
The set is quite cohesive. I took lots of photos which gave me good choice when I came to the selection stage. Some houses I took a couple of different photos on different days (some a month or more apart!) which gave me more choice in the final selection. I possibly should have avoided bin collection day, but I don't actually think they detract too much from the final images!

Did I stick to my original brief?
Actually, I did. I tossed it up in my mind quite a few times, but kept coming back to it, particularly the more images I took. I almost make the mistake of only processing my selected dozen images, but I'm very glad I didn't. I took all of my potential images and processed them all with care in Photoshop (the processing was fairly simple actually so it was not too time consuming). Then once I had them all printed as proofs, I lay them out and assessed each one in it's final form. The chosen 9 images contain some of the initial dozen but there are a number of omissions, I have even left out some of my 'favourite' images because I didn't feel that the fitted in the 'Hide' set. They may form part of a greater typological study though, should I decide to continue with the project. This has taught me a good lesson about not being too restrictive in my mind too early on - be willing to change direction mid-project as it may make the final result a better one.

What technical problems did I experience? How did I solve them?
Processing was a bit of a challenge. I needed to do it a few times before I worked out the best way to do it. I needed to be consistent across all the images, so I first did the RAW processing in Lightroom, and was planning on being able to edit the colour levels etc in Photoshop, but it turned out to be simpler to keep it all in Lightroom, and use PS for spot removal and straightening up the horizontals and verticals. I also made the mistake of cropping too early on initially so I have learnt to leave that right until the end! I also got my proofs printed and then realised I needed to loosen up the crop, but that was not a major problem, and the final prints look good (and I learnt to do a white border in Lightroom too).

Am I pleased with my final collection? What could I have done differently?
Yes! It is the first time I have really done a very cohesive set of images which really hang together very nicely. I would be proud to hang them on a wall (if I could work out how to hang them all neatly together!) The only thing I would do is take more images to enlarge the set!

And the title?
I have named my collection 'Hide' to indicate the way in which we hide behind the facade of our homes. In a literal sense, each image shows a house that has some barrier between it and the street - be it because it is set back, has a hedge or tree in front of has tinted windows. These may all have other purposes (shade/sonic insulation etc), but they also have the effect of separating the home from the street, thus the use of the 'Hide' title. I have also fairly carefully arranged the 9 images in an order which I felt made sense, grouping the images in 3 sets of 3 rows of similar type-houses.

The images are meant to be displayed in a grid, as I show in the first image below. Then I include the nine images for the assignment.

9 images displayed in grid
Hide 1
Hide 2

Hide 3
Hide 4
Hide 5
Hide 6
Hide 7
Hide 8
Hide 9


References:
Wallace, S (2013), Digital Photographic Practice (Online), Available at: http://digitalphotographyselina.blogspot.com.au/search/label/Assignment%205 [Accessed 30/07/13]

Saturday, 27 July 2013

Artist: Jeffery Millstein

Small Dreams, Trailer Parks in Palm Springs2006 – 2009, archival digital prints, 24 x 36” to 40 x 60” 
Small Dreams presents a typology of the post WWII trailers that popped up in Palm Springs, California. Early models were made using surplus sheet metal and the technology developed to make World War II aircraft. Over the years people would add on, remodel, and create mini gardens and decorative statements. Shot from the same straightforward angle, each exterior façade photograph reflects on the nuanced details and expressive personalized touches of their inhabitants
Jeffery Millstein, taken from http://www.jeffreymilstein.com for personal study purposes
This is a set of images which reminds me of my own project, though with much more quirkyness and individuality than my photos. It is typology and investigation into personality. It does, however, encourage me to continue on documenting the variety of houses that I see, and continue to produce a larger body of work in the future.

Millstein, J (2013), Jeffery Millstein Palm Springs (Online) Available at: http://www.jeffreymilstein.com [Accessed 26/07/13]

Tuesday, 2 July 2013

Book review: Design Principles


Book Review: Design Principles by Jeremy Webb
1. Basic design theory
skilful arrangement of picture information within a frame’ [p11]
photographers can include or exclude information, emphasise or diminish areas of content and adjust their position… to capture the image required’ [p11]
Design is the process, and composition is the outcome. [p11]
Isolate the elements needed for a successful image and don’t have anything else detracting from that. [p14]
Positive and negative spaces – creates space [p17]
2. The elements of design
Line, curve, shape, form, space, depth, texture, Light, colour,
3. First design principles
Pattern, repetition, rhythm,
4. Depth and scale
Positioning of photo elements – be careful and plan [p106]
The absence of scale can be used to ‘obscure the obvious’ [p116], create abstraction (using different viewpoint/ de-focusing/ proximity to subject)
5. Movement and flow
Lines and flow, use borders to contain the viewers eye within the image [p131]
6. Emphasis and emotion
Point of interest, can be colour, or simplicity, or de-focussing back/foreground, Juxtaposition,
7. Putting it all together
No set formula!
Conclusions
Some good advice – 
Limit yourself’,... Always question why it is that you are photographing something’ [p175]

This book is a good introduction to design principles for creative photography. Whilst some of it was a bit basic, I think there are a number of good points in there for me, and good ideas for challenging myself photographically. I really like the idea of including exercises within the book, and I think there are a couple of really interesting ones which I might follow up on. 

A quick image below taken recently with my iPhone, which is great for having a camera in my pocket. I think the design is quite strong particularly with the wire breaking (or forming?) the frame quite effectively. I only got one shot!

chooks and baby


References:
Webb, James (2010) Design Principles Singapore: AVA Academia

Assignment 5: Selection

I have been looking at my 44 edited house photos over the last week that I had proofs printed of. I am happy with the colours and generally with the crops, though a couple I think I have cropped in a little too tight and might loosen them up a bit. That is a fairly minor issue though. I now have to choose 12 or less for submission for Assignment 5. I laid the prints all out on the table:

Dining table covered in images
I then made arrangements of the photos, one version shown above, considering different groupings. I found it interesting to move them about, lay them next to others and see how the various 'groups' of images fitted together.

I have fitted them loosely into groups, and then spent some time just moving photos around on the table to see what ideas I came up with. I had groups based on form (i.e. triangular), style (of house for example), present of vegetation (large trees/smaller trees) and just plain aesthetics (which my original selection was primarily based on). It was very beneficial to have the images all out on the table and be able to move them around and see what worked well with what.

I have come up with two groups that I quite like at the moment, based first on asthetics (though I'm a little sure of why?). These are my favourite 9 images:
Aesthetic images

And my preferred group, which I have tentatively labelled 'hide' - to use the bird-watching analogy - of the house being somewhere we literally hide from the outside world, in a variety of ways - for example, the house being set back on the block/ trees blocking the view/ windows shaded or hidden in some way/ hedge. I think this works well with my thinking about why I started this project in the first place, my personal investigations into house presentation and what it might say about me.
Hide
In the grouping displayed above I have carefully selected the order - starting with the similar shapes first - rectangular hedges and building on the top row. Then the second is those houses almost totally hidden by trees. The third row shows houses hidden more subtly - by being set back or high fences or raised up to isolate from the street.

I note in the course notes we are to submit 10 to 12 images, but I feel like the 9 I have selected above 'fit' structurally very well together and the addition of 3 more images would destroy the balance. I hope this would not cause a problem...

I need to address a few minor issues that I have noticed in the printing process - I have cropped in a little too close on a couple of images, so want to loosen this up a bit. I will look at my prints in more detail (hopefully in the daylight if I get a chance!) before finalising them for print and submission.

It's interesting to note how different my selection is from the initial choices I made, and this reaffirms how important it is to keep an open mind about what makes a good image - I may have not chosen to process some of these images, and yet they form a coherent interesting group (in my opinion anyway!).